
Where to buy Cream Chargers: A Comprehensive Guide
For most of us, whipped cream desserts fall somewhere between a daily necessity and a daily pleasure. And if you are reading this, then you
Image sourced from starship.com
A whipped cream dispenser (cream whipper) is a device that uses nitrogen gas (N2O) in small chargers to raise the pressure of the cream. It is also used by home and professional cooks to make mousses, sauces, hollandaise, and infusions.
Proper use of whipped cream dispensers and chargers ensures safety, quality, consistency, and efficiency. You will always be able to achieve a satisfying texture and consistency of whipped cream or any other aerated dessert that you are making.
We understand that only some know how to use cream whippers and chargers properly. In this guide, we’ll take you through the parts of a whipped cream dispenser, how to fill a dispenser, how to dispense whipped cream, how to clean a dispenser, and troubleshooting.
So, let’s dive right in and learn how to use whipped cream dispensers and chargers correctly!
A whipped cream dispenser consists of the following parts:
Video sourced fromCreamright
The main part of a whipped cream dispenser or cream whipper is the body also referred to as the bottle or the canister. The bottle has a wider base and a slightly narrow neck. It is important to consider the following factors when selecting a dispenser body.
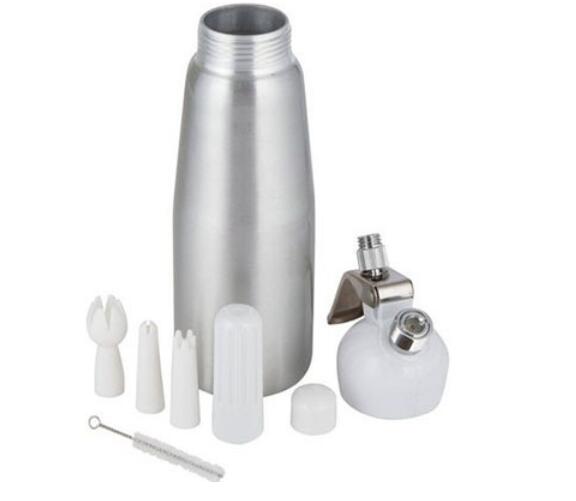
Image sourced from takealot.com
Dispenser bodies are made of either food-grade aluminum or stainless steel. The bottle and the head of the dispenser may be of different materials except for a few brands.
This is the most popular food-grade metal used by a wide range of whipped cream dispenser brands. The popularity of food-grade stainless steel is mainly attributed to its rust resistance, ease of cleaning, and attractiveness. This material can also withstand a fair amount of abuse when the bottle drops accidentally. Moreover, food-grade stainless doesn’t corrode or pit easily when exposed to food, moisture, and chemicals.
Stainless steel dispenser bodies are a great option for handling cold liquids as well as warm, savory foods. Most of them you will find on the market are also dishwasher safe. But we recommend handwashing for the best stainless steel shine.
Whipped cream dispensers with aluminum bodies are less expensive than those with stainless bottles. Food-grade aluminum is mainly used for its low cost, lightweight design, and rust resistance. But the strength and durability of an aluminum dispenser body depend mainly on other elements the material is alloyed with.
Most aluminum dispenser bodies are not dishwasher safe. The combination of cleaning agents, water, and high heat can corrode untreated aluminum. Handwashing is highly recommended for long-lasting durability. They are more suitable for preparing cold drinks.
The next important consideration for the dispenser body is size. The most popular sizes on the market are 1 pint (500ml/0.5l), 1/2 pint (250ml/0.25l), and 1 quart (1l).
You need a dispenser bottle that meets your specific cooking requirements. The common size in most domestic kitchens is 1 pint. It is a manageable size for preparing whipped cream at home, making it a great option for beginners.
The 1-quart or 1-liter size is the best choice for cooking large batches of whipped cream. It is a common size in cafes and restaurants.
The next crucial part of a whipped cream dispenser is the head or nozzle. The head houses all the remaining parts of a cream whipper, which include the piercing pin, nozzle adaptor, and extraction lever.
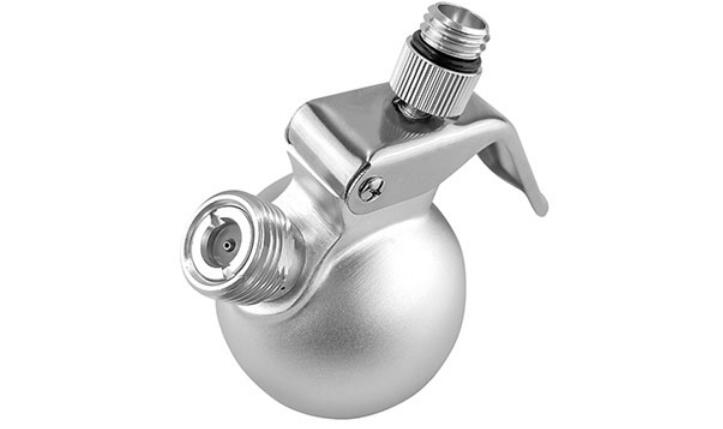
Image sourced from aldkitchen-us.com
The piercing pin (for puncturing the seal of the cream charger) is contained inside a port that is surrounded by threads on the outside for screwing the charger holder. The nozzle adaptor is for attaching different decorator tips. The lever, which looks like a handle, is for extracting whipped cream from the cream whipper.
Cream whipper heads are problematic parts and they may need replacement when they start leaking. Replacement heads come with all the important parts, such as the nozzles, holder, gasket, and cap.
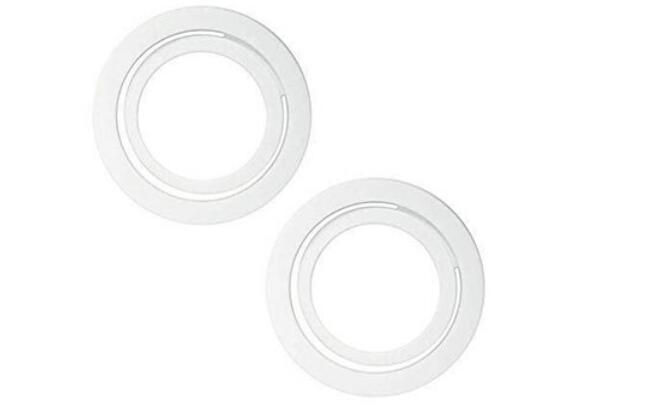
Image sourced from ebay.com
A gasket or a seal is a ring that is made up of a supple material like silicone. It is one of the most essential parts of a cream whipper head because it prevents the nitrous oxide (N2) gas from leaking. A quality gasket should have high tensile strength, low density, and good flexibility. Repeated use and cleaning of the dispenser head can lead to degradation of the gasket. If this happens, you will need a replacement gasket or seal.
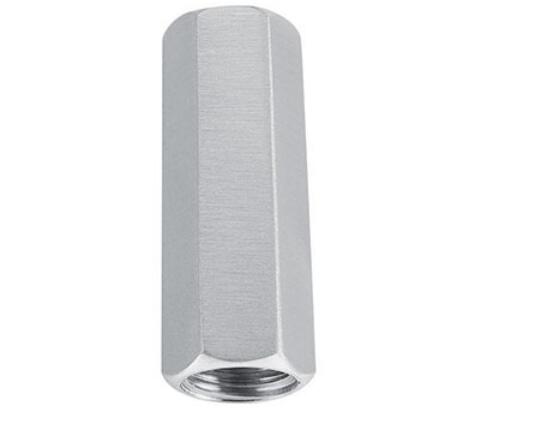
Image sourced from joom.com
A charger holder is uniquely designed to hold an N2O cartridge in place for the piercing pin to puncture the seal. Every whipped cream dispenser head comes with its original charger holder. But you can find replacement N2O cartridge holders on the market that fit standard cream whipper heads.
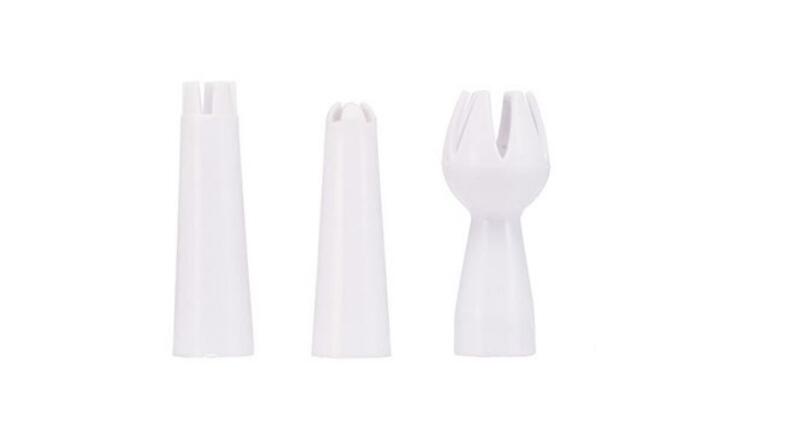
Image sourced from victoriasbasement.com.au
These are important accessories that are used by cooks to decorate desserts with whipped cream. They come in different styles but with the same thread size that fits a standard nozzle adaptor. Decorator tips are usually made of food-grade stainless steel, aluminum, or plastic. There are three main types of decorator tips – straight, star, and tulip.
If you are looking to add a professional touch to your cooking, you need to know how to fill a dispenser correctly. Here’s how to go about it:
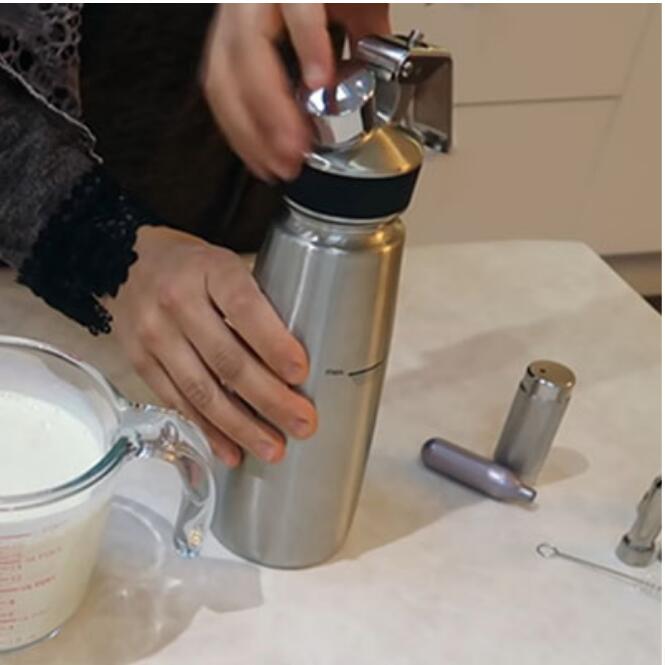
Image sourced from Cook with Anisa on YouTube
Start by releasing the head or nozzle from the dispenser body. Simply unscrew the head to release it from the dispenser bottle.
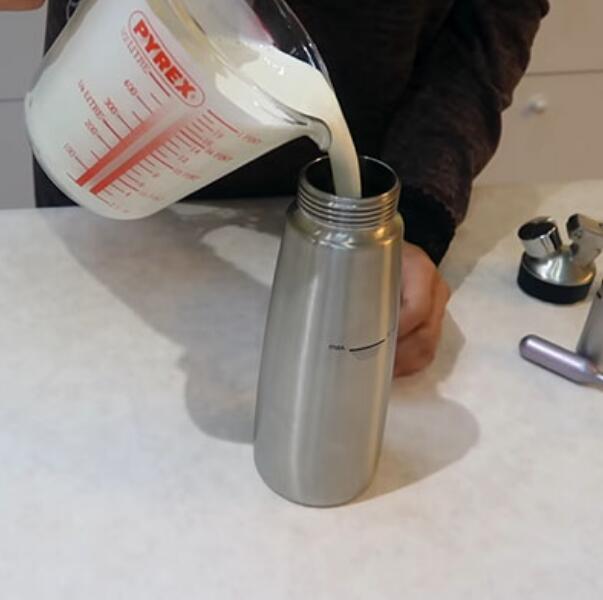
Image sourced from Cook with Anisa on YouTube
In a clean glass jar, add 16 ounces of fresh cream, 2 tablespoons of maple syrup, and 1/2 teaspoon of pure vanilla extract. Stir your vanilla extract and maple syrup into the cream until they all mix. For the sweetener, you can use alternative options like powdered sugar or stevia.
Hold the base of the whipped cream dispenser body with one hand and pour in the mixture with the other. Avoid overfilling the dispenser bottle if you used too much cream when preparing the maple syrup, vanilla, and cream mixture.
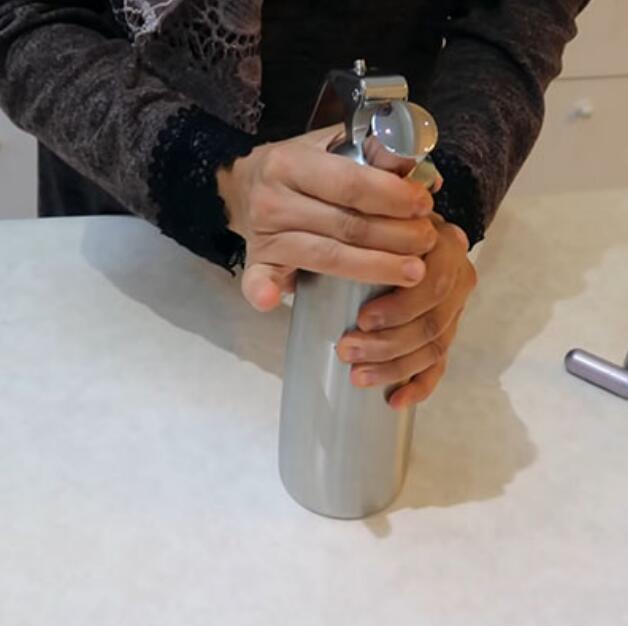
Image sourced from Cook with Anisa on YouTube
Reattach the head or nozzle and screw it until it is tight. Make sure there is a tight seal that will prevent nitrous oxide gas from escaping when charging the dispenser. Next, choose one of the three decorator tips and attach it to the nozzle adaptor.
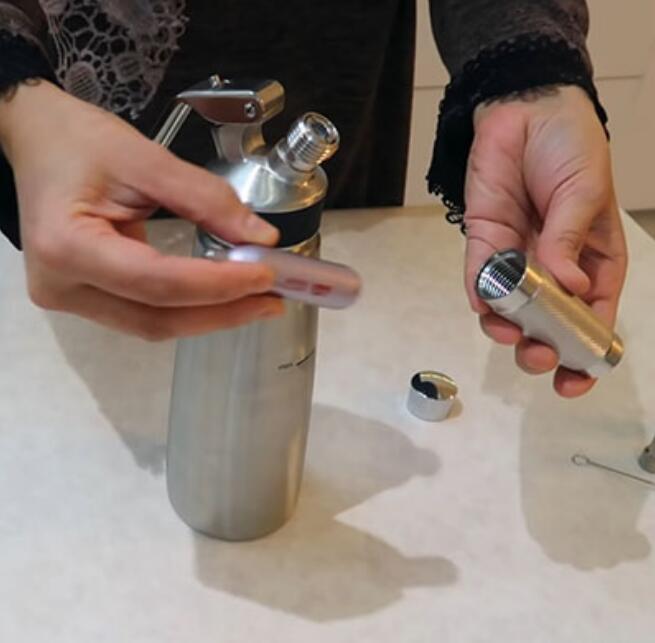
Image sourced from Cook with Anisa on YouTube
For this step, you need whipped cream chargers that are compatible with your cream whipper. Most 8g food-grade nitrous oxide cartridges fit standard whipped cream dispensers.
Remove the safety cap from the dispenser head. Insert a cream charger into the charger holder and screw it onto the port containing the piercing pin. Tighten the charger holder until the pin inside the port pierces the seal on the N2O charger. You will hear a sound when the gas is injected into the cream whipper.
Unscrew the charger hold and properly dispose of the empty N2O cartridge. Reattach the safety cap to protect the piercing pin.
Filling the ingredients into the whipped cream dispenser is the easy part. Now, let’s learn a few tips on how to dispense whipped cream correctly.
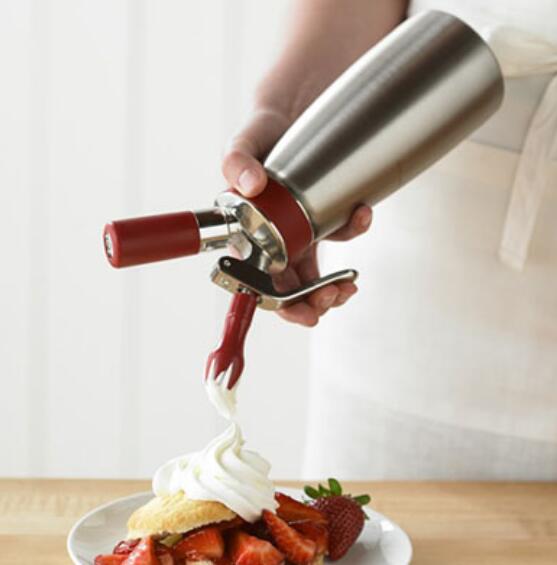
Image sourced from williams-sonoma.ca
Hold the sealed dispenser with ingredients inside in a suitable position. Then shake it for approximately 30 seconds or 10 to 20 times. This helps the gas dissolve into the cream. The liquid mixture and the nitrous oxide gas become agitated, creating a more aerated and denser whipped cream.
If you are planning to chill the mixture in the fridge for a while before using it, remember to shake the whipper before dispensing whipped cream. Failure to do this may produce inconsistent results. You may get smooth and fluffy or ragged whipped cream.
Gravity forces the cream to settle at the bottom of the cream whipper, whereas the propellant is at the top. Also, there is no opening at the bottom of the dispenser for dispensing cream. That’s why it is important to turn the dispenser upside down. This will also ensure you don’t expel the gas first if you forgot to shake the dispenser.
Immediately after shaking the mixture turn the dispenser upside down and press the extraction lever or trigger to dispense whipped cream.
When dispensing whipped cream into a cup or a glass position the decorator tip perpendicular to the container. But a more inclined position is suitable when decorating desserts like cakes, pastries, or cookies with delicious whipped cream.
It isn’t very difficult to clean a whipped cream dispenser. But there are a few things that you need to do to clean a dispenser correctly.
Video sourced from cookingguide
Not cleaning your cream whipper properly can lead to clogging. Cream particles containing fat residue can stick inside the dispensing valve. This can reduce pressure or cause malfunctions when pressing the extraction valve to dispense whipped cream.
Proper cleaning after every use ensures your whipped cream dispenser is free from mold and bacteria. The remaining cream particles may have gone bad if the whipper wasn’t refrigerated. This can provide favorable breeding conditions for harmful bacteria.
Cream and fat residue from previous use can affect the flavor of your current whipped cream. Residue cream and fat will mix with your ingredients, altering the taste, quality, and purity of the whipped cream.
You can help extend the lifespan of your whipped cream dispenser through proper cleaning and care. It’s quite easy for accumulated cream and fat residue to corrode or damage the dispensing valve, which will most likely shorten the lifespan of the dispenser.
Here are the quick step-by-step guidelines for proper cleaning of your cream whipper:
Start the cleaning process by pressing the extract lever over the sink until the dispenser is completely depressurized and empty.
Unscrew the head and separate it from the dispenser body. Place the bottle on the sink. Now, remove the decorator tip from the nozzle adaptor. Press the lever while pulling the dispensing valve out of the head from the bottom. Then remove the head gasket.
It is important to remember that not all the parts of the cream whipper are dishwasher safe. So, it’s best to wash every component by hand to avoid degradation.
You can use the included brush to clean the valve and the decorator tips. Warm soapy water is a good option for cleaning all the dispenser parts. We wouldn’t recommend using strong detergents as they can strip the coating on the inside of the dispenser.
Allow the dispenser components to air dry before reassembling them. Then insert the dispensing valve into the head followed by the gasket. Screw your decorator tip onto the nozzle adaptor and reattach the safety cap over the piercing pin.
In this section, we will go through important troubleshooting steps you can try in different situations.
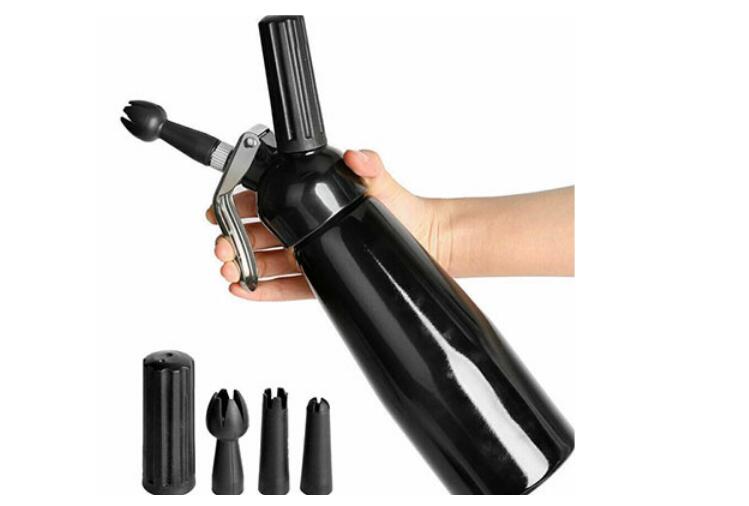
Image sourced from mydeal.com.au
Sometimes the extraction lever may refuse to move. It gets stuck when trying to press it to dispense whipped cream.
What you don’t want to do is unscrew the head when the dispenser is pressurized. The pressurized contents will come out flying and this could be messy and dangerous. The head could pop out and hit your face at high speed.
Unscrew the decorator tip from the dispenser head. Then place a towel over the nozzle adaptor and push down onto the dispensing valve. Pressing the valve will release air and pressure from the dispenser through the nozzle. The sound of air/gas escaping will stop once the dispenser is depressurized.
Now try pressing the lever to see if it will move. If it doesn’t, then the problem wasn’t the pressure inside the dispenser but something else.
You may have to empty the dispenser and follow the instruction manual to disassemble for a closer inspection.
You are probably using the wrong type of cream. The most ideal whipping cream that can give you consistent results should not contain less than 22% fat. So, consider using whipping that contains about 35% fat or heavy cream that’s made up of 38% fat. A higher fat content does not make the cream thicker but also transforms it into stable whipped cream.
Another reason your whipped cream is running watery is not shaking the dispenser properly. As we mentioned earlier, shaking helps agitate nitrous oxide and the cream mixture. The cream becomes more aerated, denser, and fluffier. But don’t shake the bottle longer than is necessary (10 to 20 times should be enough).
The dispensing valve or the nozzle is probably clogged due to improper cleaning and maintenance. You can only know for sure if you remove the valve and clean it with a brush and warm soapy water. Also, make sure the tips are thoroughly cleaned with a brush to remove residue cream, and fat.
You may also get a low amount of whipped cream out of the nozzle because there isn’t enough pressure. Make sure you are using high-quality whipped cream chargers that contain nitrous oxide. A dispenser larger than 500ml size should be charged with two nitrous oxide cartridges.
If you experience a leak of any kind, you should stop the cooking process and inspect the whipped cream dispenser.
The first culprit could be a malfunctioning dispensing valve. The second thing to check is the head gasket. A torn or worn-out gasket will not provide a good seal when you tighten the dispenser head. So, you need to replace both the valve and the head to stop the gas leak.
Here are a few things you can do to prevent issues with your cream whipper:
Our guide has not only provided you with advice on how to use whipped cream dispensers and chargers but also useful tips for cleaning and troubleshooting. If you closely follow this guide, you will be able to get consistent results and extend the lifespan of your whipped cream dispenser. As you have seen it is more convenient to use a whipped cream dispenser and cream chargers to make whipped cream than traditional methods.

For most of us, whipped cream desserts fall somewhere between a daily necessity and a daily pleasure. And if you are reading this, then you

Image sourced from m.indiamart.com At StarWhip, we understand the importance of fast and efficient whipped cream charger delivery. That’s why we’re excited to introduce our

In today’s digital age, online shopping has become a staple for many. From clothes to electronics, almost everything is available at the click of a
Laughing gas, scientifically known as nitrous oxide (N2O), has various applications ranging from medical to culinary. Whether you’re a dentist looking for sedation options, a

In recent times, there has been a significant buzz around the age requirement for purchasing whipped cream chargers, especially in New York. The question arises

Whipped cream chargers have revolutionized the culinary world, making it easier than ever to create fluffy, delicious whipped cream in seconds. But a common question