Nitrous Oxide Tanks: How They Work
Embark on a culinary journey with our detailed step-by-step guide for using StarWhip Nitrous Oxide tanks to create extraordinary culinary delights. From assembling the essential tools to achieving exceptional results, we’ve got you covered.
You Will Need

StarWhip 615g Tank
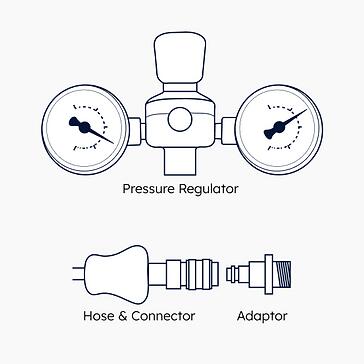
Pressure Regulator

Cream Dispenser

Your Ingredients

Step 1: Set Up the Regulator
Before starting, position the nitrous oxide tank on a stable surface. Attach the pressure regulator to the tank’s valve, ensuring a tight and secure fit.

Step 2: Ready Your Dispenser
Fill your cream dispenser with the whipped cream mixture and seal it properly.

Step 3: Connect the Adaptor
If your pressure regulator comes with an adapter, connect it to the regulator. This adapter ensures compatibility between different types of cream dispensers and nitrous oxide tanks.

Step 4: Attach the Pressure Regulator Hose
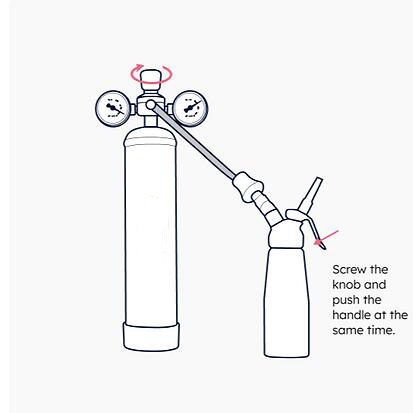
One end of the filling hose should be connected to the pressure regulator, while the other end should be attached to the cream dispenser. Ensure both connections are tight to prevent any gas leakage.

Step 5: Adjust the Gas Pressure
Gradually open the regulator valve. Watch the gauge and set it to the recommended pressure, usually around 20 bar for most whipped cream recipes.
Step 6: Release the Pressure
Allow the nitrous oxide to flow into the dispenser for about 30 seconds or until the sound from the tank diminishes, indicating the dispenser is filled.
Step 7: Disconnect the Hose
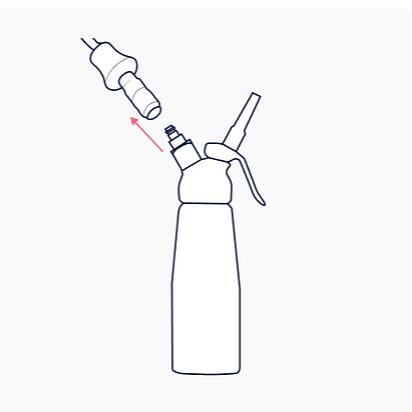
Turn off the gas flow, then carefully detach the filling hose from both the dispenser and the regulator.
Step 8: Mix, Shake, and Serve
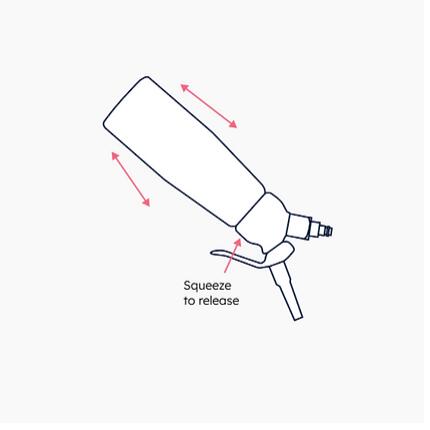
Give the dispenser a gentle shake to mix the nitrous oxide and cream. Attach your chosen nozzle, press the handle, and enjoy your perfectly whipped cream!
Explore the endless possibilities of culinary innovation with StarWhip Nitrous Oxide tanks. Elevate your desserts, sauces, and beverages to new heights of deliciousness. Start your culinary adventure today!
